Introduction:
This guide will provide you with an understanding of what OxTS products offer CAN, the features offered and best practice for setup along with troubleshooting advice.
|
|
Contents:
|
OxTS Products that offer CAN features:
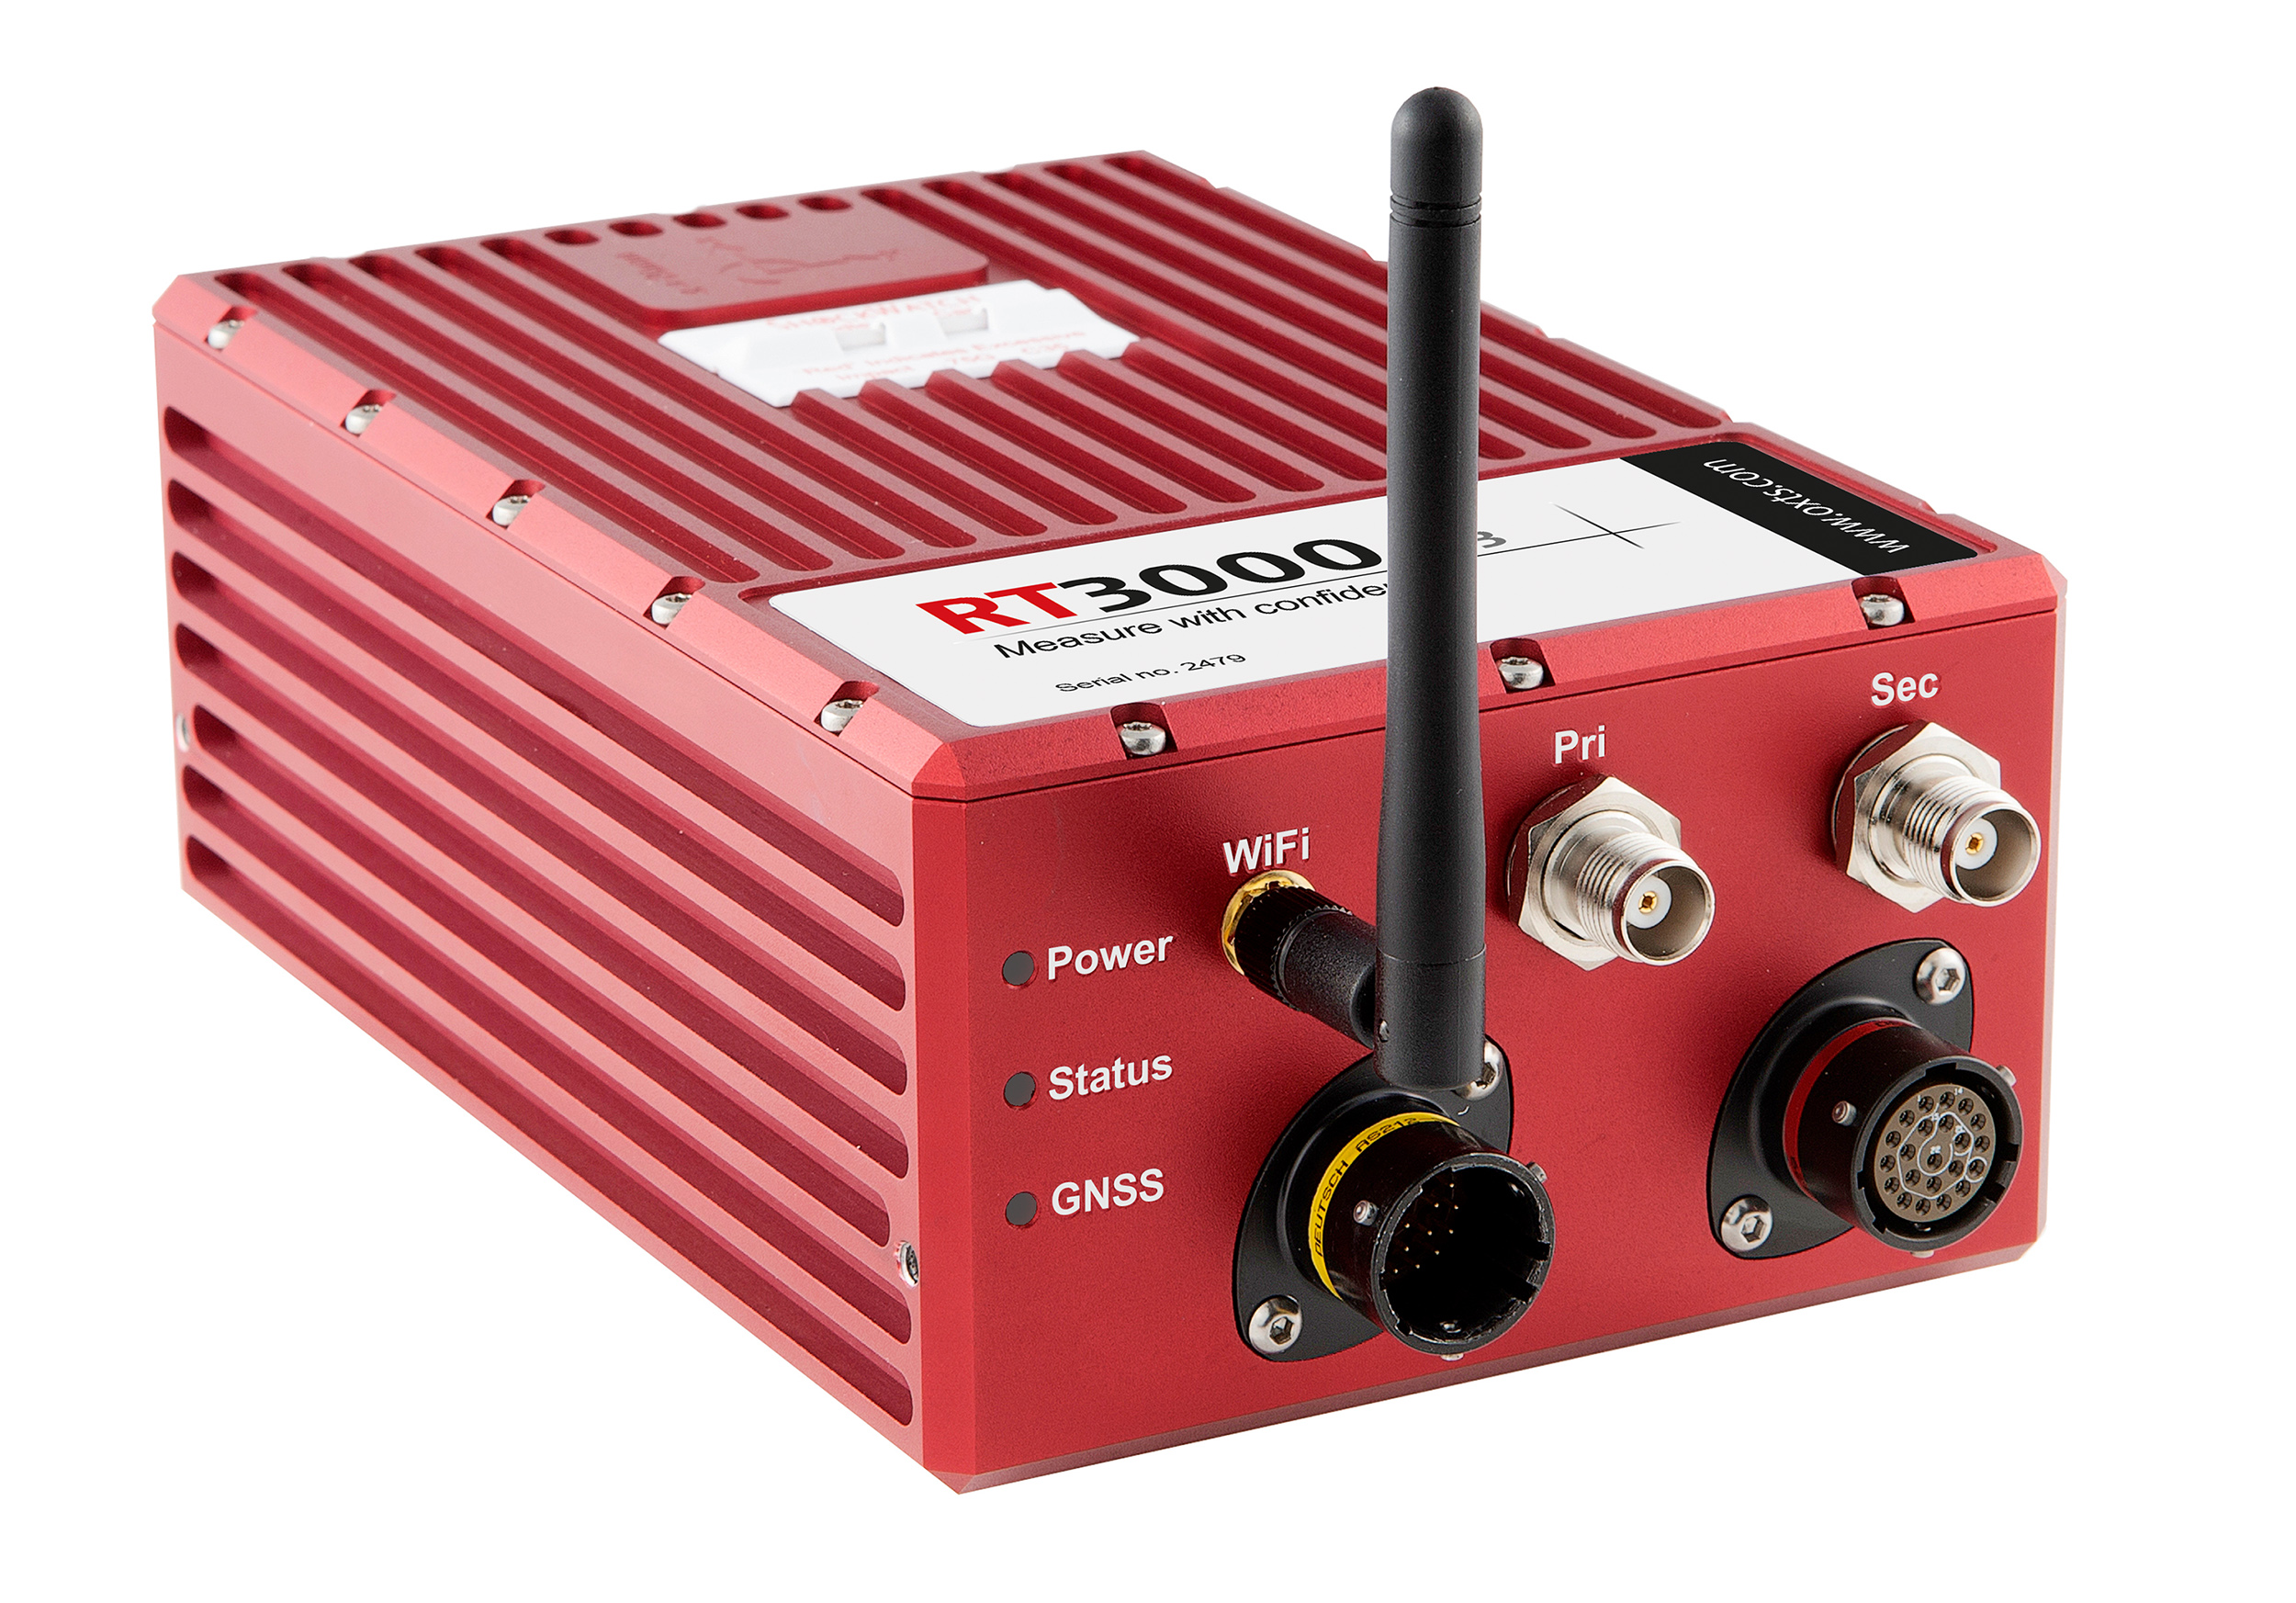 RT3000v3 RT3000v3 RT3000v2 RT3000v2 RT-Range S Hunter RT-Range S Hunter
RT1003
|
CAN overview
What is CAN?
The Controller Area Network (CAN) is used in e.g. vehicles for communication between ECUs, sensors and actuators.
Use with OxTS products
CAN enables multiple sensors including OxTS RT and Range products to be used in conjunction to output data in real time to a centralised logger or monitoring system.
Another setup could be using an OxTS RT as the centralised data hub to store its own INS (Inertial Navigation System) data along with CAN messages (up to 12) from other input sources.
CAN protocols
CAN 2.0 - Default OxTS protocol, data rates up to 1Mbit/s.
CAN FD - Latest protocol supporting data rates up to 8Mbit/s.
DBC files
A CAN DBC file lets you convert raw CAN bus data to physical, readable data.
Hardware considerations
CAN Cable - You will require a cable to connect your CAN devices that features a 120 Ohm terminating resistor between CAN High and CAN Low. This is a feature of the CAN bus. You are advised to always connect the grounds of the systems as many systems will not work unless the ground is connected.
|
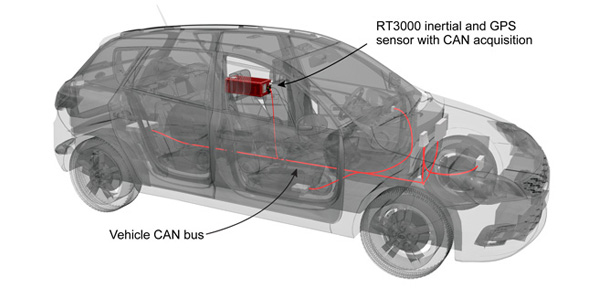 RT in vehicle CAN network RT in vehicle CAN network |
OxTS CAN overview
Features and availability
OxTS CAN Features
|
Description
|
Product availability
|
CAN Output
|
Output selected OxTS measurement messages in real time over a CAN bus. |
- All OxTS RTs with enabled feature code
- RT-Range S Hunter
|
CAN Acquisition
|
Input CAN signals can be acquired and logged within the RD file on the unit. Configuration involves importing your DBC file with CAN input messages to be acquired during RT configuration. |
- All OxTS RTs with enabled feature code
|
CAN FD
|
Output or acquire messages using the CAN FD protocol offering enhanced data rates over CAN 2.0. |
|
|
OxTS CAN messages
OxTS standard CAN messages are divided into two main groups, RT and RT-Range messages.
RT Inertial Navigation Systems (INS) output:
- Inertial Navigation System (INS) sensor information
- Status and configuration information
RT-Range systems output:
As above they output RT INS information, identified as Hunter unit with the addition of:
- Range status and configuration messages
- Vehicle to vehicle range information
- Vehicle to Lane range information
|
OxTS CAN messages
|
OxTS CAN configuration software
|
|
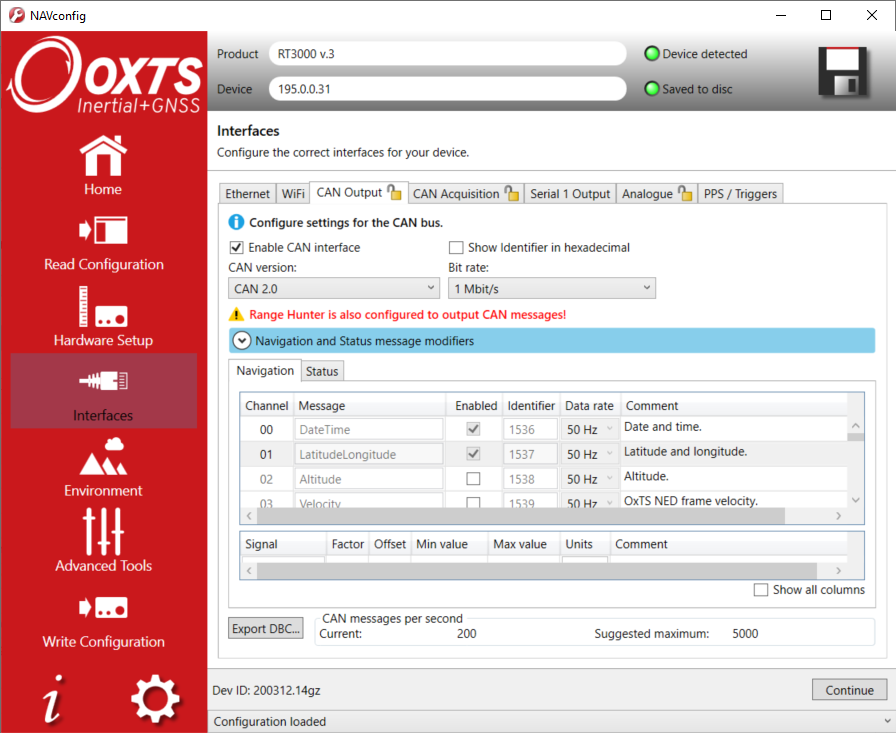
NAVconfig - CAN Output
Software - Location:


Notes:
*Options only available for CAN FD.
**CAN FD only available on RT3000v3 & RT500s
|
CAN Output reference:
- Enable/Disable CAN output
- Change CAN message Identifier (16) to display as hexadecimal.
- *Enable/disable flexible data rate - (6) "Data bit rate".
- Select CAN version, option of CAN 2.0 or **CAN FD
- Output data rate selection.
- *Flexible data output selection.
- *Drop down to show/hide Sample point selection for each output rate.
- Drop down to Show/Hide additional message modifier settings
- Prefix and/or Suffix (14) Message names by up to 4 character total.
- Offset identifiers (16) for all output messages by the same value.
- Prefix and/or suffix Signal name (19) by up to 4 characters total.
- OxTS CAN output messages have been grouped into 2 tables: Navigation and Status information. Select from either tabbed table.
- Table reference number.
- Message short name (modifiable).
- Enable messages individually or all to be output by CAN.
- Unique CAN message identifier (modifiable).
- Choose frequency of message output with data rate drop down.
- Long name or message description.
- Selected message Signal information.
- Option to display additional Signal details.
- Export selected CAN messages to DBC file for logging decoding.
- Total CAN message output per second.
- Maximum output for selected data output rate.
|
NAVconfig - CAN Acquisition
Software - Location:

|
CAN Acquisition reference:
See CAN Output reference for details on unlabelled Acquisition configuration options.
- Enable/disable CAN interface. If either CAN Output or CAN Acquisition is enabled, the interface is enabled on both tabs.
- Import DBC file populates the table with your CAN messages to select which ones you wish to log. On unit commit the DBC file will be uploaded to the unit allowing it to decode and store your CAN messages.
- Enabled messages shows messages enabled regardless of input rate.
- Maximum of 12 messages enabled is fixed and will only enable the first 12. If you click enable all column for a list greater than 12.
|
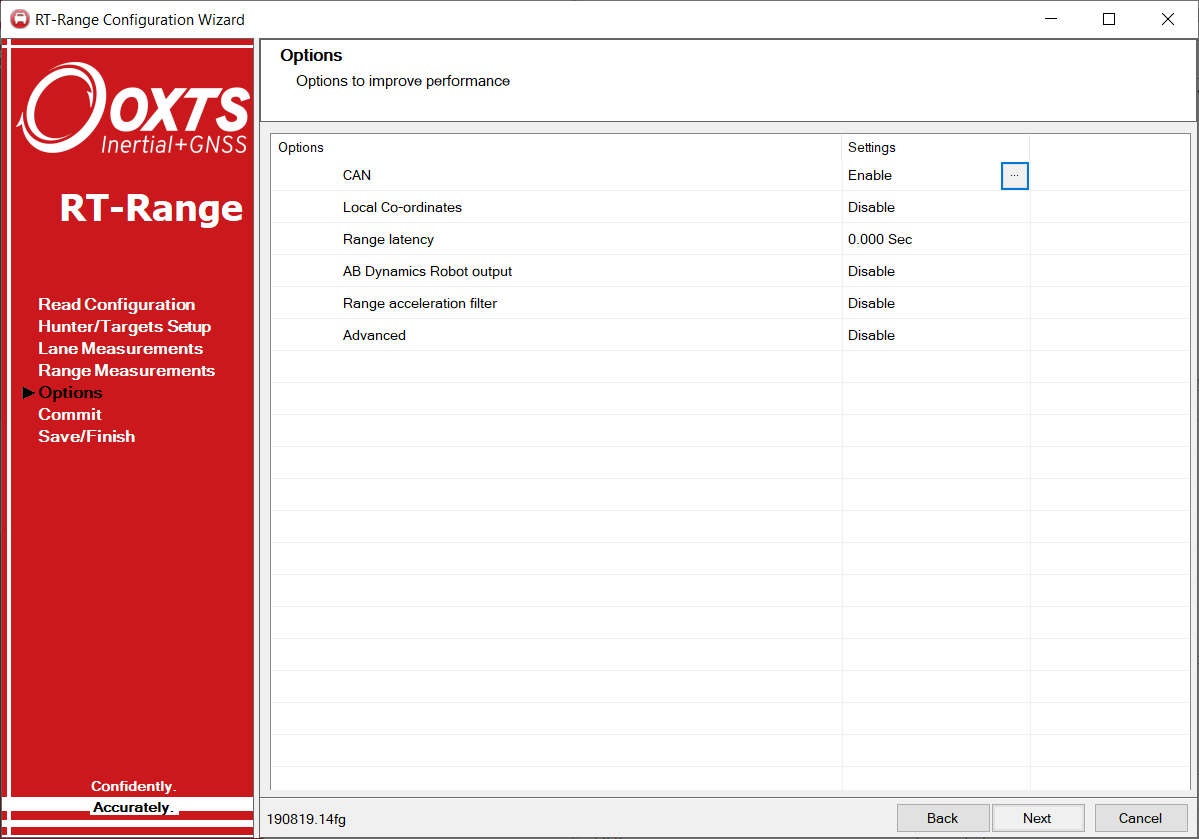
RT-Range Configuration Wizard - CAN Output
|
|

|
Software - Location:
- RT-Range - Real-Time Display > Configure RT-Range > Options (Section)
- Click > Cell - CAN (Row), Settings (Column)
|
|
|
|
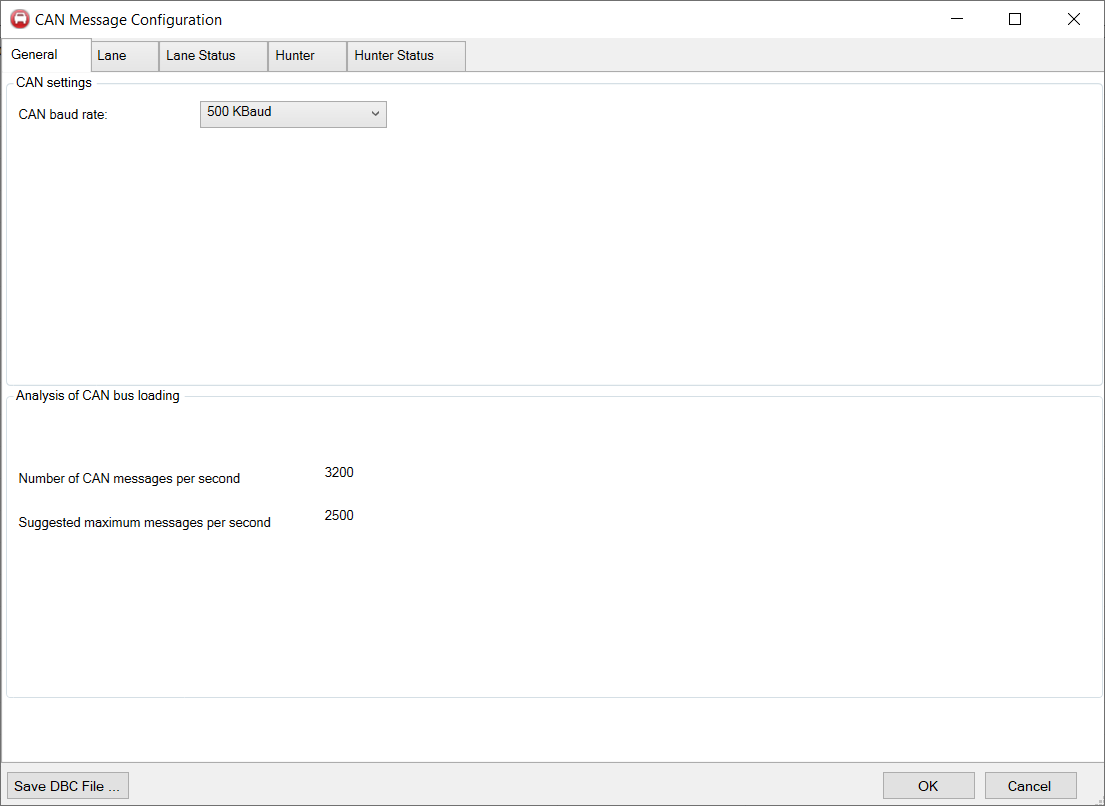
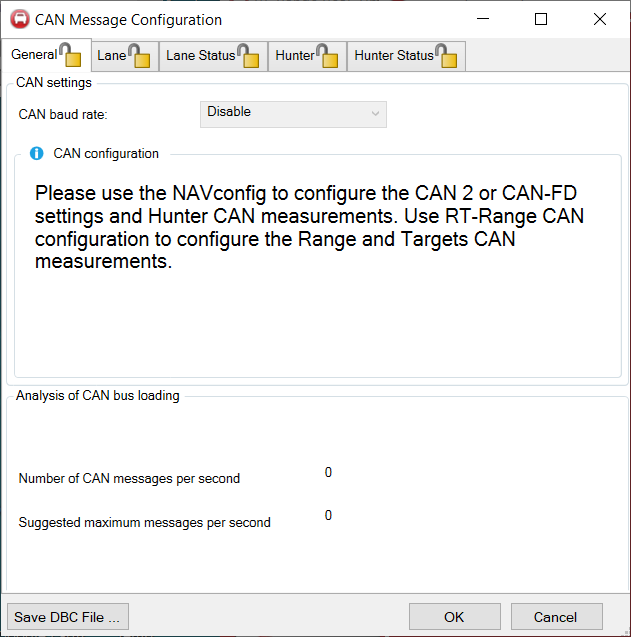
General (Tab)
Location:
CAN Message Configuration (Wizard) > General (Tab) opens in new window
Settings:
- Configure CAN output baud rate or disable RT-Range CAN output.
- View total messages enabled along with maximum output rate.
|
|
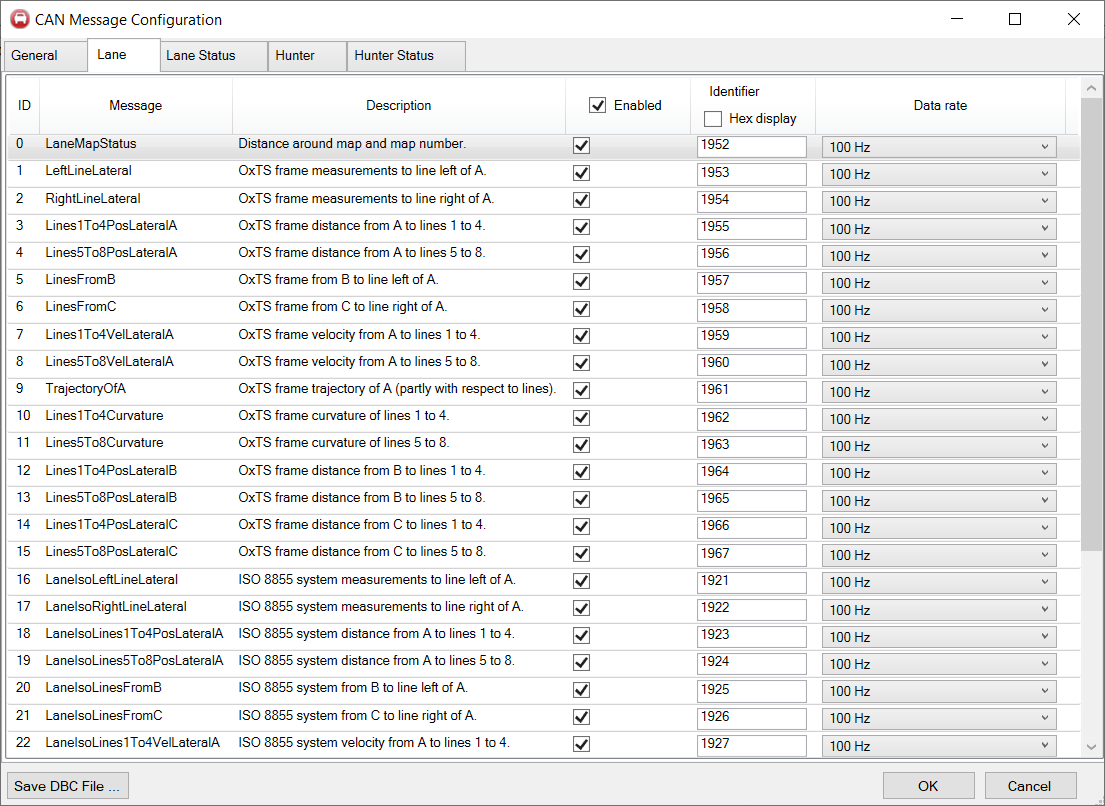
Message tabs
RT-Range messages are grouped by type and sorted into tabbed tables.
Core message tabs are always visible (eg. Hunter) but additional message tabs (eg. Target) become available when features are enabled.
Message output is enabled ticking the checkbox.
Individual message identifiers can by modified using the input.
Individual message data rate can be changed using the drop down selector.
|
CAN Output configuration
CAN Output is available from OxTS RT and RT-Range S Hunter products.
|
|
RT CAN Output setup
Software - Location:
Steps:
- Navigate to > CAN Output (Tab)
- Tick > Enable CAN interface
- Select > CAN version (if CAN FD supported for selected product)
- Select > Bit rate (Note: Lower rate limits number of output messages)
- Select desired output messages by ticking checkbox in enabled column. Select messages from Navigation (Tab) or Status (Tab) tables.
- Click > Export DBC...
- Commit configuration to RT in Write configuration (Section)
|
Note:
Enable CAN FDs increased output rate by:
- ticking > Flexible data rate
- Select > Data bit rate (Drop down)
|
RT-Range S Hunter CAN output setup
Software - Location:
RT-Range - Real-Time Display > Configure RT-Range > Options (Section) > CAN (Settings)
Steps:
- CAN Message Configuration (Wizard) > General (Tab)
- Enable CAN by selecting > CAN baud rate
- Enable desired output message by selecting group tab and ticking > checkbox in enabled column.
- Data rate output of individual messages can be changed by selecting > data rate (Drop down)
- Ensure maximum messages have not been exceeded by checking > General (Tab)
- Click > Save DBC File...
- Click > Ok
- Commit configuration to RT-Range in Commit (Section)
|
Note:
Configure CAN options AFTER completing all previous RT-Range sections, to see all available CAN messages.
Maximum message exceeded warning:

|
RT3000v3 Hunter CAN Output configuration:
The RT3000v3 is a combination of two hardware products into one. Because of this, configuring CAN output sometimes requires the use of two software applications (NAVconfig and Configure RT-Range).
It is important to understand what settings are configurable in each software application and what messages are available and where.
For a general overview of where to enable messages see OxTS CAN Messages diagram (right).
Software CAN output responsibilities
NAVconfig - All output settings and RT related messages.
Configure RT-Range - Range related messages.
|
OxTS CAN messages
|
RT3000v3 CAN Output configuration - RT messages only
Setup unit identical to RT CAN Output setup instructions.
|
|
RT3000v3 CAN Output configuration - Including RT-Range messages
|
|
Setup
(RT3000v3 CAN Output configuration - RT + RT-Range messages)
Turn CAN output on in NAVconfig
- Setup unit identical to RT CAN Output setup instructions.
Configure RT-Range
- RT-Range - Real-Time Display > Configure RT-Range > Use default settings
- Select > RT-Range Hunter - RT3000v.3
- Configure all RT-Range settings Excluding CAN settings.
- Commit configuration to unit.
- Save and Finish configuration wizard.
- Re-open > Configure RT-Range
- Select > Load initial settings from RT-Range
- Select > IP address of your unit and Click > Next
- Navigate to > CAN (Settings)
- Select RT-Range CAN output messages.
- Ensure maximum messages have not been exceeded by checking > General (Tab)
- Click > Save DBC File...
- Click > Ok
- Commit configuration to RT-Range in Commit (Section)
|
|
Modify configuration
(RT3000v3 CAN Output configuration - RT + RT-Range messages)
Modifying RT messages or data output settings
When modifying RT messages you modify in NAVconfig and must then update the RT-Range configuration as Hunter messages are related.
- Modify RT message output
- NAVconfig - Interfaces > CAN Output (Tab)
- Update settings
- Commit configuration to unit
- Update RT-Range configuration
- RT-Range > Real-Time Display > Configure RT-Range (Wizard)
- Select > Load initial settings from RT-Range
- Select > IP address of your unit and Click > Next
- Navigate to > CAN (Settings)
- Modify RT-Range CAN output messages.
- Ensure maximum messages have not been exceeded by checking > General (Tab)
- Click > Save DBC File...
- Click > Ok
- Commit configuration to RT-Range in Commit (Section)
|
|
Modifying RT-Range CAN messages only
When modifying RT-Range only messages this can be done with Configure RT-Range solely.
- RT-Range > Real-Time Display > Configure RT-Range (Wizard)
- Navigate to > CAN (Settings)
- Modify RT-Range CAN output messages.
- Ensure maximum messages have not been exceeded by checking > General (Tab)
- Click > Save DBC File...
- Click > Ok
- Commit configuration to RT-Range in Commit (Section)
|
|
Disabling CAN output
(RT3000v3 CAN Output configuration - RT + RT-Range messages)
When disabling CAN output without changing your Range configuration you must do so in the following order to avoid conflict issues:
- Disable RT-Range CAN messages
- RT-Range > Real-Time Display > Configure RT-Range (Wizard)
- Select > Load initial settings from RT-Range
- Select > IP address of your unit and Click > Next
- Navigate to > Options (Section)
- Click > Cell - CAN (Row), Settings (Column)
- Click > ... (CAN settings button)
- Disable all RT-Range CAN output messages.
- Click > Ok
- Commit configuration to RT-Range in Commit (Section)
- Disable CAN output
- NAVconfig - Interfaces > CAN Output (Tab)
- Disable CAN by unticking > Enable CAN interface
- Commit configuration to unit
- Update RT-Range
- RT-Range > Real-Time Display > Configure RT-Range (Wizard)
- Select > Load initial settings from RT-Range
- Select > IP address of your unit and Click > Next
- Navigate to > Commit (Section) and commit configuration.
- Save and Finish.
|
|
CAN Acquisition configuration
Only OxTS RT products support CAN Acquisition feature.
|
|
RT CAN Acquisition setup
Software - Location:
- Navigate to > CAN Acquisition (Tab)
- Tick > Enable CAN interface
- Select > CAN version (if CAN FD supported for selected product)
- Select > Bit rate (Note: Lower rate limits number of output messages)
- Click > Import DBC file...
- Click > Export DBC...
- Browse for and select open on your DBC file.
- Table will populate with CAN messages contained in DBC file.
- Tick > Enable (Check box) on messages you wish to log
- Commit configuration to RT in Write configuration (Section)
|
Note:
CAN Acquisition can log a max of 12 messages. If enable all selected on a list greater than 12, only the first 12 will be enabled.
|
Troubleshooting
|
|
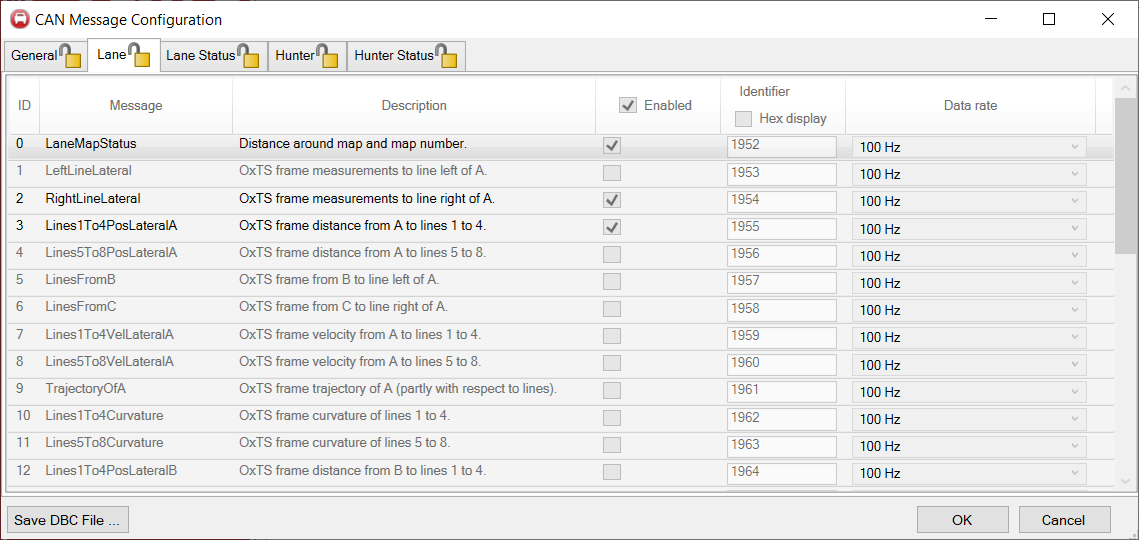
"Locked" RT-Range messages
|
Issue:
CAN messages "Locked" in Configure RT-Range.
Cause:
CAN output has been disabled without removing RT-Range CAN messages first.
Solution 1:
Enable CAN Output in NAVconfig then follow Disabling CAN output.
Solution 2:
Warning -This will reset all RT-Range configuration settings.
Reset RT-Range configuration by committing a default configuration file with no CAN messages enabled to the unit.
|
RT-Range CAN "Disabled"
|
Issue:
Cannot configure RT-Range CAN messages as showing as "Disabled"
Cause 1:
Using an RT3000v3 and you have not Enabled CAN output in NAVconfig.
Solution 1:
- Enable CAN in NAVconfig and commit to unit.
- When unit is back online Read settings from unit again in Configure RT-Range.
Cause 2:
Using an RT3000v3 and CAN output enabled but you are using a default configuration. Configure RT-Range needs to read the CAN configuration from an RT3000v3 Range unit so the software knows what CAN settings have been enabled.
Solution 2:
In Configure RT-Range - Do not use default settings, instead select to read settings from range unit or follow Setup steps.
|
NAVconfig enabled RT messages "Locked"
|
Issue:
You wish to disable/modify RT CAN messages but they appear locked enabled in NAVconfig.
Cause:
Configuration conflict between software applications.
Solution 1:
Warning -This will reset all RT-Range configuration settings.
Reset RT-Range configuration by committing a default configuration file with no CAN messages enabled to the unit.
Solution 2:
Modify RT CAN output whilst keeping your other configuration settings using NAVconfig and Configure RT-Range.
> NAVconfig:
- Select > Modify configuration
- Read settings from your unit
- Save configuration to file.
- Click > Read configuration (section)
- Read settings from your saved file
- Navigate to Interfaces - CAN Output
- All previously locked messages will appear as unticked.
- Re-enable messages you wish to keep enabled.
- Leave unticked those you wish to disable.
- Proceed to Write Configuration
- Commit configuration to unit.
> Configure RT-Range:
- Read settings from unit
- Open CAN settings and save DBC file if required
- Commit settings to unit
|

Comments
0 comments
Please sign in to leave a comment.